Snowflake Dynamic Data Masking: Enhancing Data Security and Compliance
Introduction:
Snowflake, a leading cloud data warehousing platform, offers a powerful feature called Dynamic Data Masking that plays a crucial role in enhancing data security, compliance, and data governance.
This blog post will delve into what Dynamic Data Masking is, its benefits, and how to implement it effectively within your Snowflake environment.
What is Dynamic Data Masking?
Dynamic Data Masking is a column-level security feature that uses masking policies to selectively mask plain-text data in tables and view columns at query time. In Snowflake, masking policies are schema-level objects, which means a database and schema must exist in Snowflake before a masking policy can be applied to a column. Currently, Snowflake supports using Dynamic Data Masking on tables and views. At query runtime, the masking policy is applied to the column at every location where the column appears. Depending on the masking policy conditions, the SQL execution context, and role hierarchy, Snowflake query operators may see the plain-text value, a partially masked value, or a fully masked value.
Steps to apply Snowflake Dynamic Data Masking on a column
Step 1: Create a Custom Role with Masking Privileges The below SQL statement creates a custom role TECHNICAL_LEAD in Snowflake.
1
2
3
4
5
6
create role TECHNICAL_LEAD;
grant usage on warehouse compute_wh to role TECHNICAL_LEAD;
grant usage on database MARKETING_WH to role TECHNICAL_LEAD;
grant usage on schema MARKETING_WH.PUBLIC to role TECHNICAL_LEAD;
grant select on MARKETING_WH.PUBLIC.EMPLOYEE_DETAILS  to role TECHNICAL_LEAD;
Step 2: Create a Masking Policy
The below SQL statement creates a masking policy employee_dynamic_masking that can be applied to columns of type number.
1
2
3
4
5
6
create or replace masking policy employee_dynamic_masking as (val NUMBER) returns number ->
  case
    when current_role() in ('TECHNICAL_LEAD') then 99999999999999999999
    else val
  end;
Terraform:
1
2
3
4
5
6
7
8
9
10
11
12
13
14
15
16
17
18
19
20
21
22
23
24
25
26
27
28

terraform {
  required_providers {
    snowflake = {
      source  = "chanzuckerberg/snowflake"
      version = "0.25.18"

    }
  }
}

resource "snowflake_masking_policy" "employee_dynamic_masking" {
  name               = "employee_dynamic_masking"
  database           = "MARKETING_WH"
  schema             = "PUBLIC"
  value_data_type    = "number"
  masking_expression = <<-EOF
case
when current_role() in ('TECHNICAL_LEAD') then
val
else
'999999999999'
end
EOF

  return_data_type = "number"
}
Step 3: Apply (Set) the Masking Policy to a Table or View Column
1
2
3
ALTER TABLE IF EXISTS "MARKETING_WH"."PUBLIC".employee_details
MODIFY COLUMN SALARY SET MASKING POLICY employee_dynamic_masking;
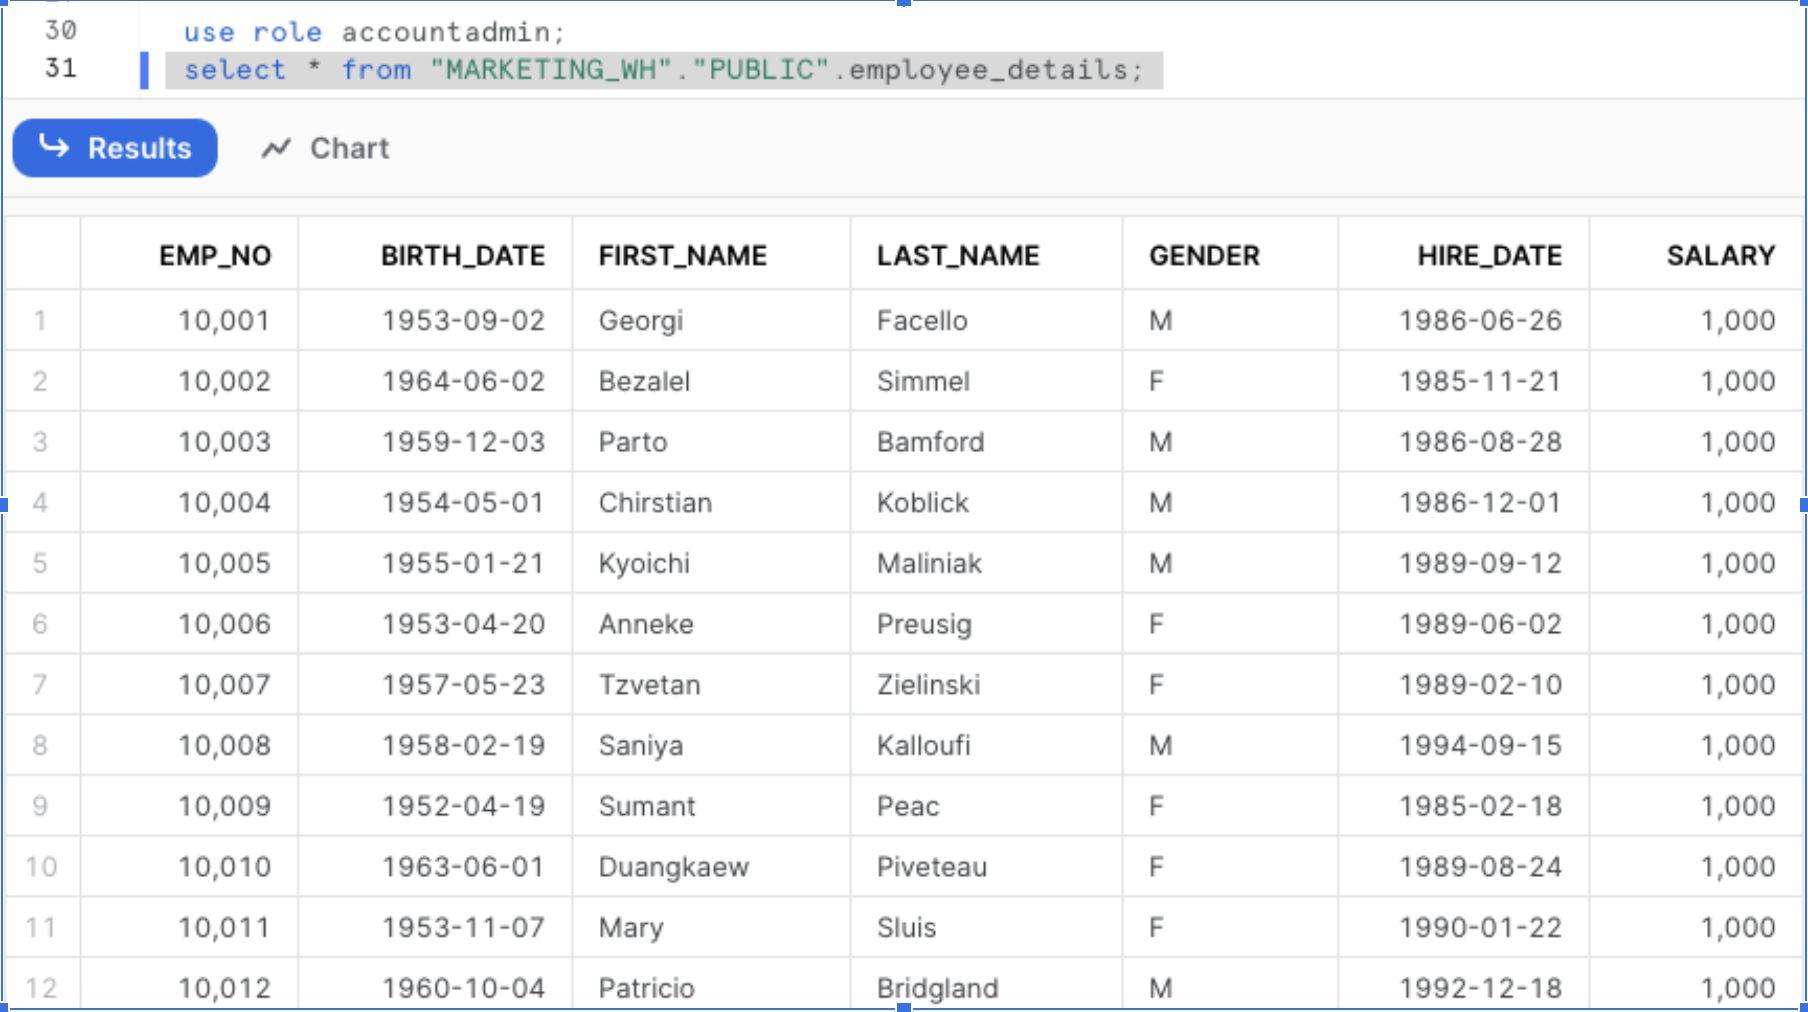
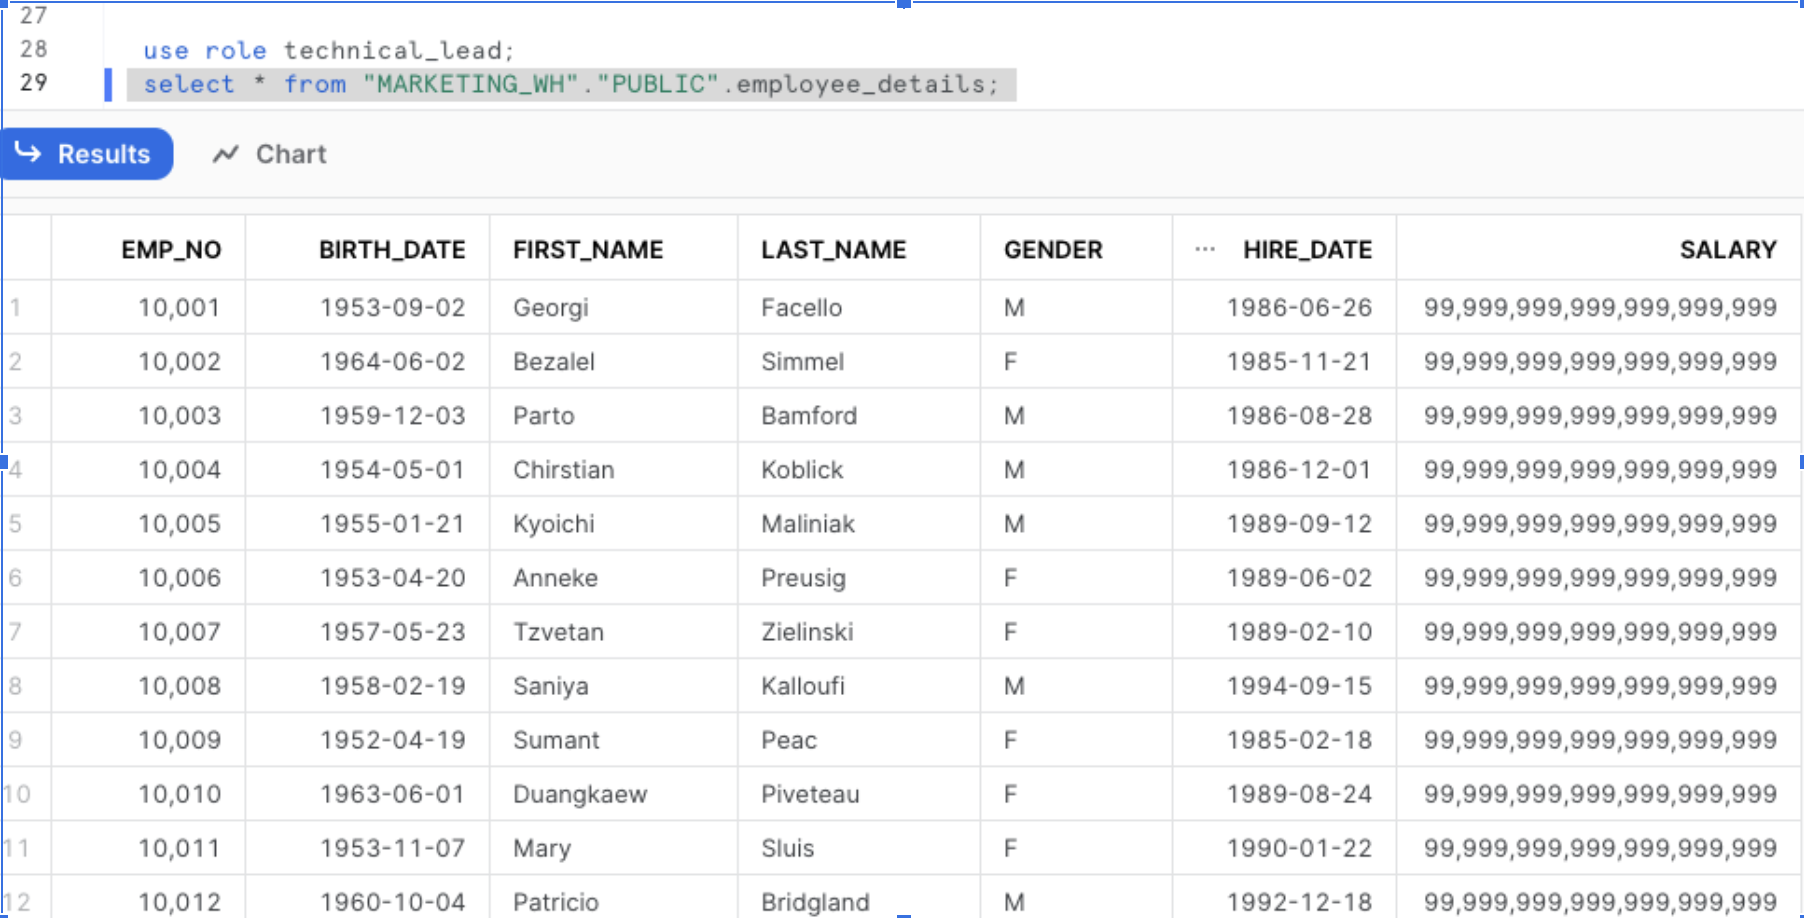
Step 4: Verify the masking rules by querying data
Verify the data present in the EMPLOYEE_DETAILS table by querying from two different roles. The below image shows data present in EMPLOYEE_DETAILS when queried from TECHNICAL_LEAD role.
Benefits of Dynamic Data Masking
- Data security: Dynamic Data Masking ensures that sensitive data remains confidential and is only accessible by authorised individuals.
- Regulatory compliance: Dynamic Data Masking assists organisations in adhering to data protection regulations such as GDPR, HIPAA and more.Snowflake supports customers with IRAP(Australia) compliance requirement IRAP.
- Fine-grained access control: Different users or roles can have varying levels of access to masked data, based on their authorisation level.
Conclusion
In this post, we have discussed how to create the data masking manually and using Terraform. Dynamic Data Masking is a powerful feature that allows organisations to protect sensitive data while still enabling data analysis and sharing. By implementing Dynamic Data Masking in your Snowflake environment, you can enhance data security, meet compliance requirements, and maintain the trust of your customers and stakeholders.
Note: This article was originally published on Cevo Australia’s website
If you enjoy the article, Please Subscribe.